• Die Forumsregeln und Nutzungsbedingungen findet ihr in der Navbar unter Impressum !
    Bitte unbedingt beachten!
    Wie überall im Leben gibt es Spielregeln, so auch hier!
    Die Datenschutzerklärung zum DSGVO findet ihr ebenfalls in der Navbar unter Datenschutzerklärung !
    Hinweis nach DSGVO :
    Es ist hier keinerlei Angabe erforderlich. Alle Angaben in diesem Bereich sind öffentlich sichtbar und werden freiwillig gemacht. Mit einem Eintrag in diesem Bereich erkenne ich dieses an, und bestätige die Datenschutzerklärung zur DSGVO für das Forum gelesen zu haben.

    Danke

ScaleART Baustoff-Mulde Abroll kipper

Rakthi

New member
Registriert
14.03.2014
Beiträge
132
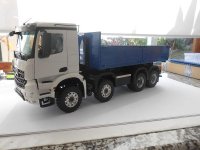
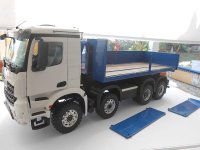
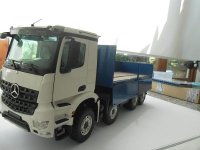
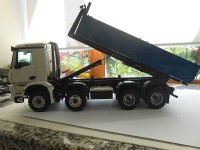
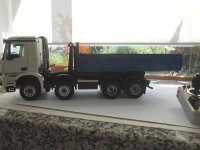
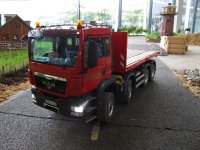
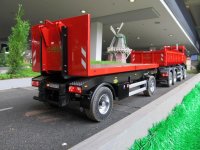
Just finished building an AROCS 8x8 with a Baustoff-Mulde. Didn't do the build thread of the truck itself here since there are already some. Those who are interested can look here for the English version or here for a Dutch version of the build, all mistakes and problems included :)

Since nobody has done one of these things on this forum yet, here goes.

Basically this is a larger version of the small one Christian has on the back of his ACTROS.

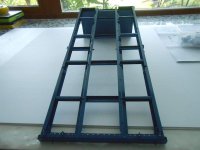
Part 1
864.jpg

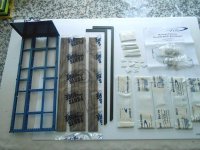
Very nice finish of the metal work.

866.jpg

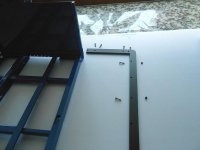
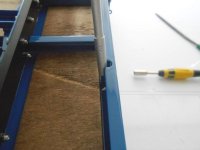
First the glider bars are attached

867.jpg

Front M2 model bolts

869.jpg

Bottom regular philips screws

870.jpg

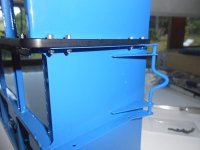
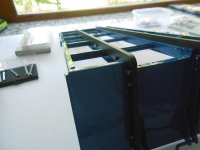
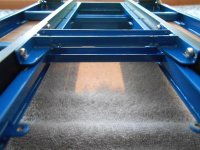
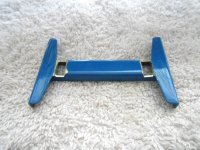
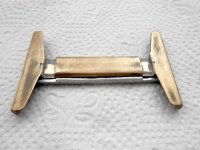
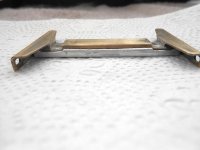
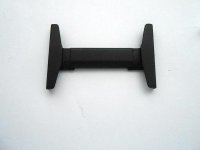
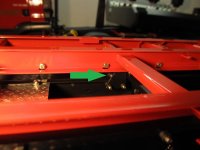
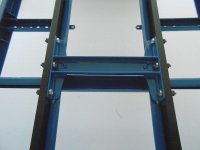
Then the cross brace behind which the sliding hooks of the roll on/off mechanism slide when kipping. Very tight fit. Had to loosen the screws on the glider bars to get it in.
871.jpg

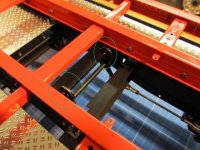
Then the rollers. The openings in the support needed some filing before I could get the pins through. A small round file makes it easy.
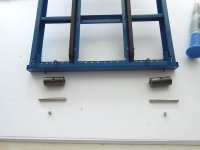
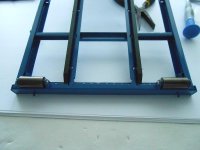
872.jpg

873.jpg

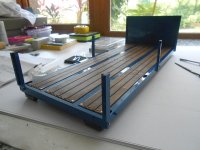
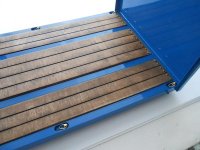
Next the wooden boards. According to the manual copper nails need be inserted after widening the openings with a 1mm drill. Then cut excess and file flat. The wood in this kit was already prepared like this by ScaleART. They also supplied the nails. So not sure if this is normally delivered like this or not.
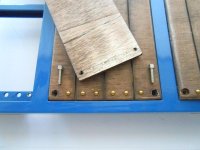
874.jpg

The boards are fastened with M2 model bolts. The holes in the frame have thread so no nuts needed. Except for the middle ones of the 2 small side pieces. Somehow the threaded holes were in the wrong place. I used M2 nuts to hold them in place.
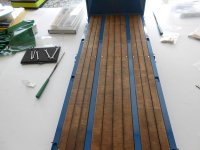
875.jpg
 
Part 2

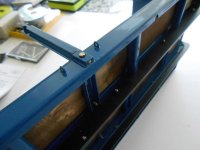
Next are the uprights. They get bolted on with one M2 model bolt.

876.jpg

Here too some filing is needed. Some excess paint needs to be removed from the upright as well as the attachment point. Again small files come in handy!

877.jpg

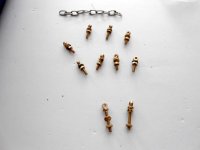
Next the eyebolts and chain links to tie down the load

878.jpg

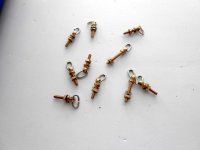
8 are needed but 10 are with the kit. The two long ones I used at the rear. There is no room to get the nut on the eyebolt due to the support of the roller. These long ones fit perfectly.

879.jpg

ScaleART has foughtfully made indents so you would have access with tools to the nuts that go on the eyebolts ... sadly enough none of my tools fitted. Even if I would have gone for the M2 model nuts, still no go. Well after struggling with the first 2, figured out an easy way to do it.

881.jpg

882.jpg

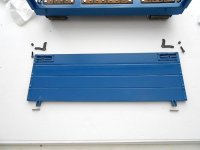
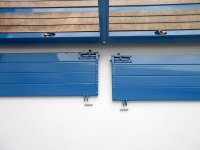
Next the side panels and tail gate. A very elegant and effective locking mechanism.

883.jpg

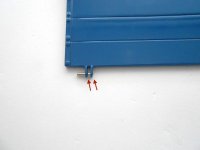
The pins get glued with crazy glue where they go through the holes.

884.jpg

Same for the side panels. The front panel get the pins going to the right and the rear one the pins go to the left.

886.jpg

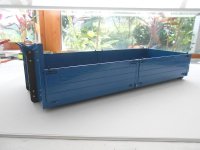
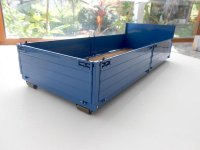
The container finished

887.jpg

888.jpg

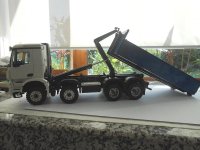
And on the truck - I like the different ways you can use it.

890.jpg

891.jpg

892.jpg

893.jpg

894.jpg

895.jpg

Although this is not one to dump muck in ... I think another container is in the future :)

Cheers and apologies for the English, but the pictures speak for themselves!

Stephan
 
Hey Stephan
Ein Top Modell:ok:star:ok:star
Gruß Uwe
 
Danke Uwe! :prost

jetzt testen :trucker und sehen, was herunterfällt ... :)
Cheers!

Stephan
 
Hi Tom,

diese Mulde ist doch eine "Pflicht-Ausstattung" für Deinen Abrollkipper mit Ladekran! Wenn Du die noch nicht bestellt hast, kann ich sie Dir nur wärmstens ans Herz legen. Damit rundest Du Dein Modell erst richtig ab. :ok

Ich war von der Konstruktion der Ballastpritsche am ACTROS SLT - die ja im Wesentlichen gleich konstruiert ist - derart beeindruckt, dass ich mir nun auch eine Baustoffmulde von ScaleART für den Abrollkipper gegönnt habe. Sie ist "ScaleART-like" detailliert und kann durchaus auch als Flachbett ohne Bordwände und Rungen eingesetzt werden. Also wieder einmal ein hoher Spiel- und Nutzwert mit nur einem Aufbau.
 
Hi Christian, die Mulde is gans einfach zusammen zu bauwen.

Und du hast recht, Tom sollte sich einer kaufen! Das gehort bei den Pallfinger!

Hier ein letztes Bild wo man sehen kan wie der letzte "eyebolt" fest ist - Sehe auch dass ich dar einer grosseren washer muss stecken.

Sie konnen auch sehen das der support fur die Roller nicht gans gross genug ist.

Man must ja doch die Öffnung oval machen.

899.jpg

898.jpg
 
Hallo Stephan,

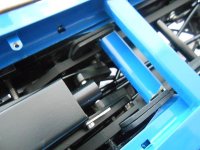
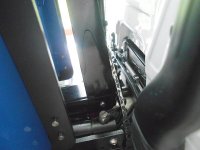
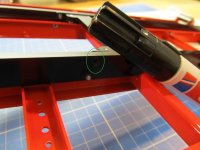
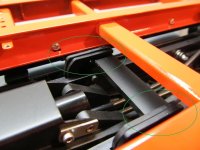
bei meiner Baustoffmulde ist es an der Quertraverse (cross brace) sehr eng (very tight). Die Spitzen der Haken des Abrollaufbaus stoßen an der Quertraverse an:

2015_07_31 (28_b).jpg

2015_07_31 (29_b).jpg

Wie sieht das bei Deiner Baustoffmulde aus? - Kannst Du uns bitte ein Bild von Deiner Baustoffmulde ohne den mittleren Holzboden zeigen? - Danke!

It looks like as if there is more space at your cross brace. Please, could you take a picture of your "Baustoffmulde" on the roll-on/-off tipper without the wooden floor in the middle? - Thank you very much!
 
Hallo Christian,

Ich werde das Morgen mal probieren. Das Holzboden is nicht zo einfach raus zu nehmen dar die Schrauben so tief sitzen.

I will try tomorrow to take some pictures. To get the wooden part out will not be so simple because the bolts are recessed.

Will see what I can do.

UPDATE

OK war nicht so schwierig wie ich dachte. Entschuldige aber jetzt geht es weiter in English. Zu technisch.

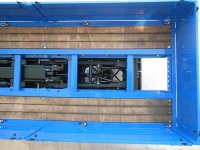
So getting the wood off was easy, and it seems mine is just like yours.

900.jpg

And here a picture with it in kip position. The hooks barely grab on to the cross brace

901.jpg

904.jpg

The mechanism (push arm) goes almost to the holder of the 2 main cylinders of the kip mechanism when pulling the container in.
Since I never looked at the underside without the wood, I thought this was normal.

902.jpg

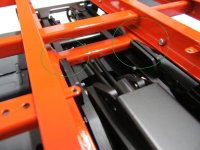
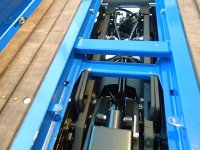
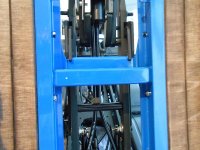
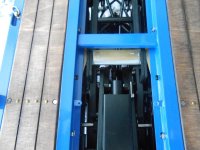
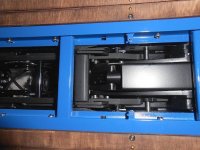
Here a view from the underside. I did loosen all the bolts of the glider bars and then the bolts from the cross brace so I could push it as far forwards as possible. The cross brace fits very tight between the gliders.

903.jpg

Overview picture.

905.jpg

So far I have had no problems with it. I just don't pick up the truck at the container.

Hope this helps. Maybe have to file a bit of the cross brace will make it more secure, but too much and then the push bar of the mechanism will run into the bar holding the 2 main kip cylinders in place.

With the other containers it is hard to see how it works.

Regards!
Stephan
 
Hi Stephan,

EN: thank you very much! - First I was wondering if there was an update at the roll-on/-off mechanism between my version (already 3 years old) an your actual version. But it seems to be another problem. Maybe wrong components have crept into production. I'm looking for a solution. When I found it, I'll show it to you ... :ok

By the way, with the other containers the mechanism works fine. I had a look on it on both container-versions. Soon I will show the high version of the containers here in the forum. ;)

DE: vielen Dank! - Zuerst dachte ich, es hätte ein Update am Abrollaufbau gegeben. Meiner ist schließlich schon drei Jahre alt und Deiner entspricht der aktuellen Version. Anscheinend ist es aber ein anderes Problem. Vielleicht haben sich falsche Bauteile in die Produktion eingeschlichen. Ich werde nach einer Lösung suchen und sie hier zeigen, wenn ich eine gefunden habe ... :ok

Übrigens, bei den anderen Mulden funktioniert der Verriegelungsmechnismus einwandfrei. Ich habe bei beiden Muldenvarianten extra darauf geachtet. Bald werde ich hier im Forum die hohe Mulde vorstellen. ;)
 
Danke Christian. Bin neugierig, zu sehen, ob es ein Produktionsfehler ist. Gespannt auf die Lösung. Denn dies ist mein erste und einige ScaleART Mulde dachte ich, es sollte so sein.

Thank you Christian. Curious to see what the solution will be. As this is my one and only container I figured this what how it was supposed to be.

:prost
Stephan
 
Beschlossen, etwas zu tun mit das Quertraverse.
Dass ist nicht nur zo hoch, wo die Seiten dran sind ist es zu breit und die Haken passen nicht zwischen.

+++++++++++++++++

Decided to mess around with the cross brace.
Not only does it come too high, where the sides are connected, they are too wide and the hooks don't fit between.

906.jpg

907.jpg

Nach einigen Sitzungen feilen und Passen bekam zu dieser Stufe. Nicht zu schön, aber noch nicht fertig.

++++++++++++++

After some sessions of filing and fitting I got this far. Not a nice clean job, but not finished yet.

908.jpg

909.jpg

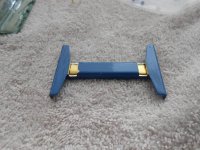
Dar doch eine Menge Material entfernt ist have ich zum verstärkeh einen Einsatz in Messing gemacht.

+++++++++++++++

Because a lot of material was removed, I made an insert out of messing to strengthen the brace.

910.jpg

911.jpg

Nächster Schritt ist der Einsatz mit UHU Endfest zu Kleben, dan spachteln un lackieren. Das ist für später.

Muss auch herausfinden, wie das Quertraverse nach vorne zu bringen. Jetzt geht dass Mechanismus gegen die stutze der Auspuff.

+++++++++++++++++

Next step will be to glue the messing with UHU Endfest, then use filler to hide the gaps and finally repaint.

That will be for another time though.

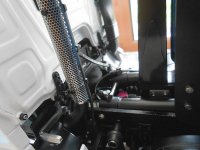
Now I have to find a way to get the brace forward about 2 mm. The mechanism now goes all the way to the diagonal support of the raised exhaust!
Might just glue a narrow bar of messing to the front of the brace. Doesn't have to be that pretty as it will be practically invisible.

:prost
 
As for the distance to the exhaust pipe: you could consider to use the rubber usually found on verona rear bumpers .
Scaleart uses this in the combination of crane and hooklift to prevent the hooklift to get too close to the crane.

your report inspired me and i will invest into this accessoir as well ;)
 
Hi Tom one of these on the back of your truck is really needed! Perfect with the Palfinger for loading pallets, building materials etc. :ok
Before you put in the order I would ask them if they have solved this little hic-up in their design! :fies

I just spend some time making a thin aluminium bar to glue to the front of the brace. If that is still not enough to clear the support of the exhaust,
I will use a strip of rubber. Thanks for the idea!

The aluminium is not glued in place yet. Feeding time for the cats here.

912.jpg

913.jpg

The diagonal brace of the raised exhaust will need some straightening once I got everything working as it should

914.jpg

Tomorrow I will glue the strip of aluminium and then some more filling and sanding.
Still waiting for the primer to arrive. Lucky I found a supplier or RAL 5010 in spray can.

:prost
 
Finally getting to update this.

I fixed the aluminium to the brass piece and tested it to see if it clears the diagonal support of the exhaust.

915.jpg

Very close, but does not touch the support. Will add some bits of rubber to give some more space.

916.jpg

Yesterday finally had a day without 100% humidity. Decided to paint the holder in black. No point painting it blue as it is hidden from view.

918.jpg

919.jpg

Added the 2 small pieces of rubber and attached with super glue.

920.jpg

Of course, first time around glued them to the wrong side ... :heilig so had to sand and paint again.

Now correct:

921.jpg

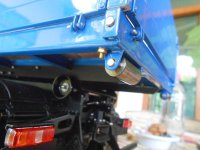
Bolted back on to the gliders and everything now working as it should.

922.jpg

Now we wait for Christian's more in depth build report to see what ScaleArt's solution is. :)

:prost
 
(...) Now we wait for Christian's more in depth build report to see what ScaleArt's solution is. (...)

Hi Stephan,

I'm still waiting for it. There must be another modification too, so that the cross brace fits better to the trailer. Because of this, I decided to wait for the ScaleART-solution.

I won't start another building report for the "Baustoffmulde". If you agree, I will post some details here in your thread. :prost
 
Hi Tom, thanks for the compliment and the tip of using rubber! Works like a charm now. :ok

------------------------------

Hi Christian, of course it is fine to post those details here. :ok The more details the better :)

I'm glad you pointed out the problem with the cross brace. :thx could have cause some damage to the sliding hooks in the long run!
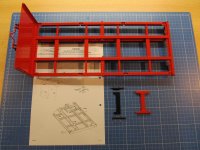
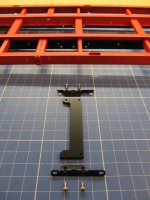
:prost
 
UPDATE: Neue Quertraverse für die Baustoffmulde von ScaleART

(...) Hi Christian, of course it is fine to post those details here. :ok The more details the better :)

I'm glad you pointed out the problem with the cross brace. :thx could have cause some damage to the sliding hooks in the long run!
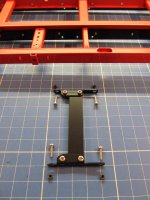
:prost

Hi Stephan,

thank you very much for allowing me to post some pictures in your thread. :ok


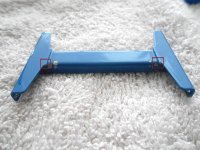
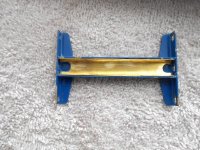
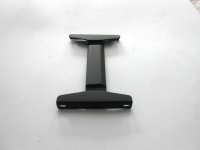
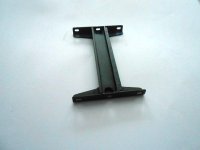
DE: Es gibt eine neu konstruierte Quertraverse für die Baustoffmulde.

EN: An updated version of the cross brace is out now!

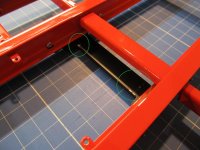
2015_09_18 (1).jpg

2015_09_18 (3).jpg

2015_09_18 (4).jpg


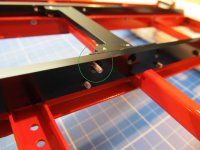
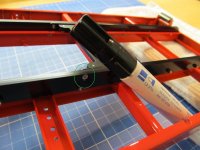
DE: Aufgrund der Senkungslöcher am Längsprofil des Schlittens, habe ich die Rundkopfschrauben der Bauanleitung gegen Senkkopfschrauben getauscht und sie von außen nach innen verschraubt. Den Schraubenkopf habe ich zur Tarnung einfach mit einem wasserfesten Stift schwarz angemalt.

EN: Because of the sunk holes on the longitudinal profile of the carriage, I swapped the round head screws of the manual against countersunk screws and bolted them from the outside inwards. The screw head I simply painted black with a waterproof pen.

2015_09_18 (6b).jpg

2015_09_18 (8b).jpg

2015_09_18 (9b).jpg


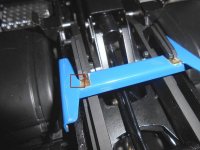
DE: Den Funktionstest hat die neue Quertraverse nun bestanden. Sie kann unter die Haken des Abrollaufbaus gleiten und wird sicher gehalten. Die kleinen Lackabschürfungen belegen den sicheren Halt.

EN: The new cross brace has passed the function test. It can slide under the hooks of the roll-on/-off-mechanism and is held securely. The small scratches prove a secure hold.

2015_09_18 (10b).jpg

2015_09_18 (15b).jpg


DE: Auch auf dem Abrollanhänger kann die Mulde nun sicher abgestellt werden.

EN: It also fits to the trailor.

2015_09_18 (14).jpg

2015_09_18 (11b).jpg

2015_09_18 (13b).jpg


DE: Wenn ich beim weiteren Zusammenbauen meiner Baustoffmulde noch ein paar Kleinigkeiten finde, werde ich sie hier ebenfalls ergänzen. ;)

EN: If I find some other details in the further assembling of my "Baustoffmulde", I'll also show them here. ;)
 
Hi Christian

Interesting to see that your profiles have countersunk screw holes! They keep changing/evolving/updating the parts all the time!

Thanks for the update and the pictures of the new and improved part! :ok

Stephan
 
Hi Christian (...) Thanks for the update and the pictures of the new and improved part! :ok

Stephan

Hi Stephan,

it's a great pleasure for me. I think we do a good teamwork. :ok

Angeregt durch Euch habe ich mir die Baustoffmulde nun auch bestellt ;)

Gratulation, Lars, zu dieser Entscheidung! :ok

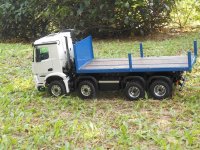
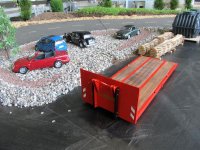
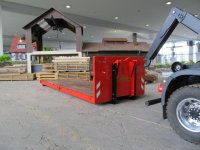
Meine war heute erstmals als Flachbett unterwegs, weil ich an den Bordwänden noch etwas Tuning betreiben möchte und auch noch auf die geplottete Firmenbeschriftung vom Werbefachmann warte.

IMG_7283.jpg

IMG_7292.jpg

IMG_7294.jpg

IMG_7320.jpg

Es ist durchaus eine Überlegung wert, sich noch eine zusätzliche Mulde als reines Flachbett herzurichten. Dann entfällt das Ab- und Anschrauben der Rungen und man könnte sich ein paar "flachbett-typische" Accessoires einfallen lassen, die sich mit den Bordwänden weniger in Einklang bringen lassen. :heilig
 

Servonaut
Zurück
Oben Unten